Book Folding Patterns: How to Fold a Book Step by Step
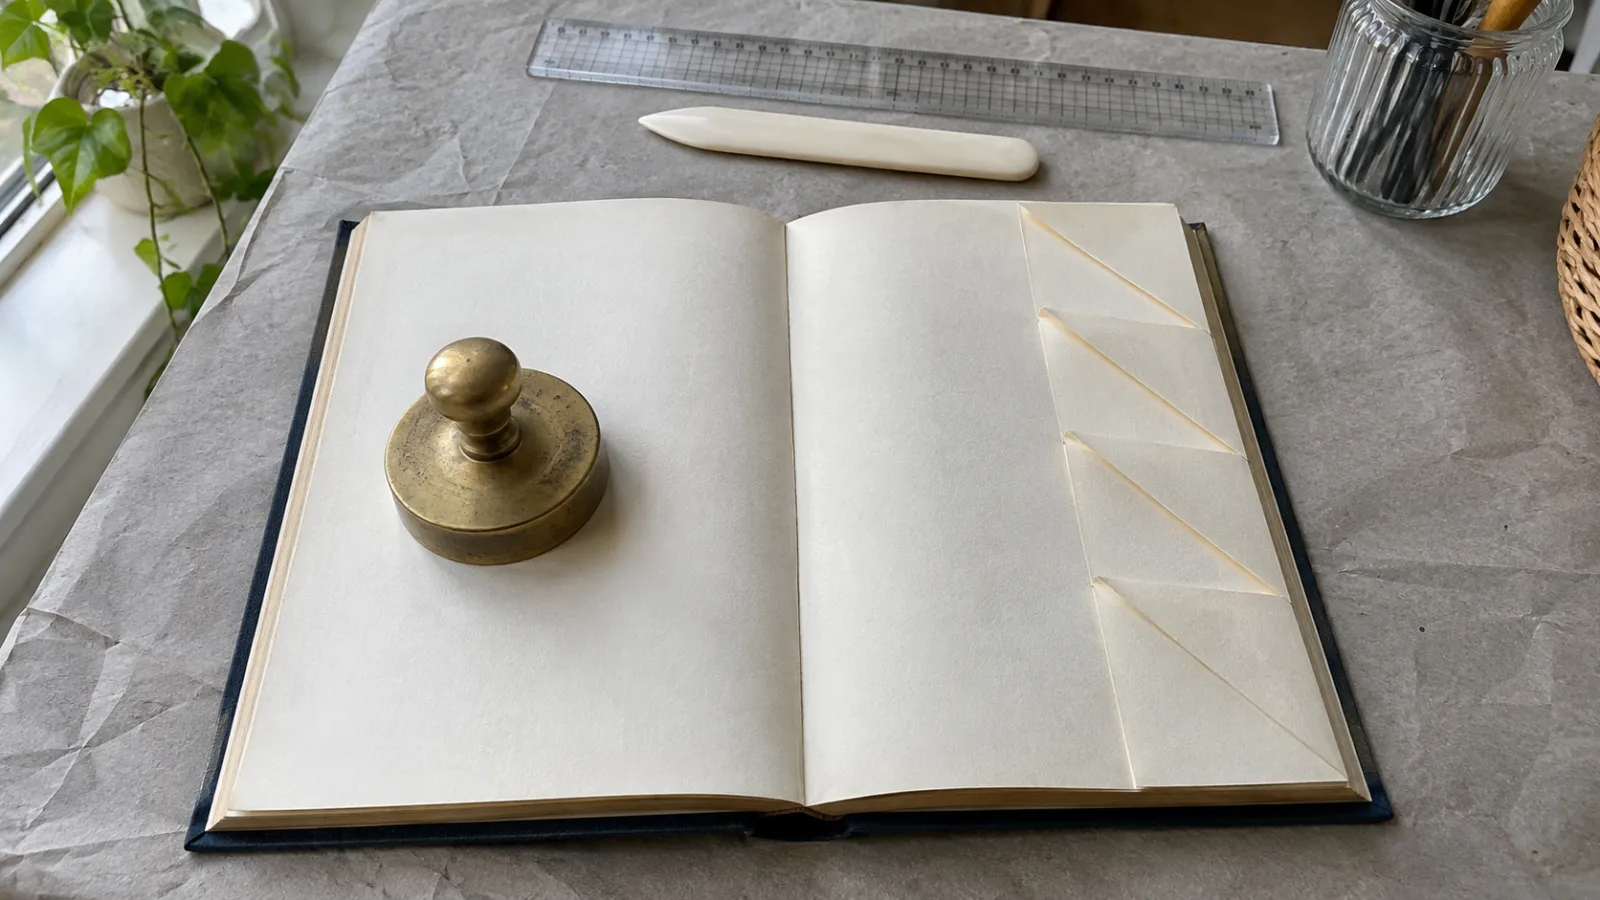
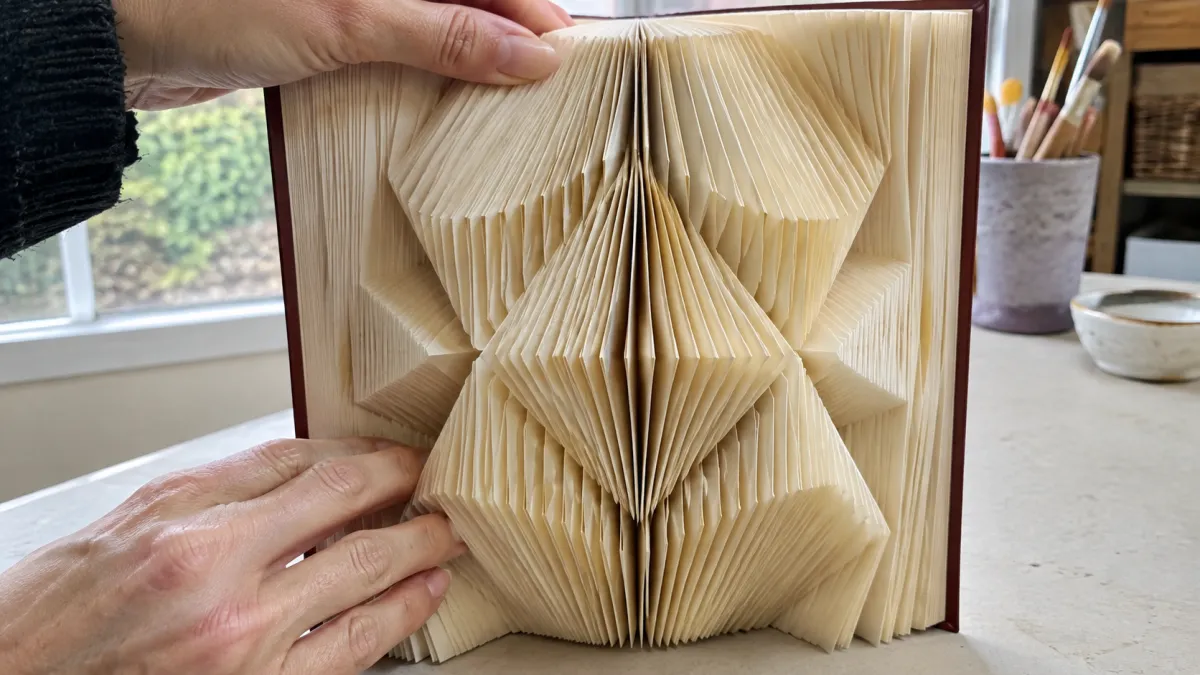
Book folding turns a hardcover into a three-dimensional sculpture by folding its page edges at measured points. Stand the finished book with its covers fanned slightly open, and the edges line up across hundreds of leaves to form a heart, an initial, a geometric shape or a whole word.
You don't need expensive equipment, artistic training or a knife to start. You need patience, a clear metric ruler, a sharp pencil and a pattern you can follow. The work comes down to counting pages, centering the design and keeping your creases even. Those are all things you can do at the kitchen table on your first attempt.
How book folding patterns work
Folding keeps the pages clean and changes only their edges; if you would rather paint, collage and cut into the pages themselves, see altered book ideas.
A folding pattern maps a flat silhouette across the fore edge of a book. This is the outer vertical edge of the pages, opposite the spine. When the book is closed, that edge looks flat and solid. Folding each leaf inward creates pockets of light and shadow that give the image its shape.
The two main pattern styles are Measure, Mark, and Fold (often abbreviated as MMF) and Cut and Fold. Combi patterns combine the two, mixing measure-mark-fold corners with cut-and-fold tabs.
Measure, mark, and fold (MMF)
Measure, Mark, and Fold is a good place to start because it needs no scissors or craft knives. Each page stays intact at the spine and along its margins.
In an MMF pattern, you make two marks on each leaf, measuring down from the top edge. Fold the paper above the top mark downward into a triangle, then fold the paper below the bottom mark upward into a matching triangle. Leave the section between the marks upright. Viewed from the fore edge, the triangles sit back inside the book and the upright edges form the image.
MMF works well for solid shapes, bold silhouettes, monograms and simple icons. The uncut pages keep the book structurally intact. If you want to read the book again, you can unfold each page and smooth it flat with a bone folder. No paper has been cut, glued or removed from the binding.
Cut and fold patterns
Cut and fold patterns need small horizontal snips along the fore edge. Measure and mark points down the page, then use small embroidery scissors to cut horizontally into the paper to a depth of about 10 to 15 millimeters. Fold the resulting tabs backward.
Cut and fold has two main styles:
- Inverted folding: The paper tabs inside the pattern silhouette are folded inward toward the gutter, creating a recessed design that sinks into the text block.
- Embossed folding: The background tabs are folded inward while the silhouette tabs remain flat, making the design stand outward in relief from the surrounding page edges.
Cut and fold can handle details that folding alone cannot, including floating punctuation marks, complex serif lettering and multi-line artwork. The cuts are permanent, though. A bone folder won't undo an accidental snip. Start with a standard MMF pattern for your first project.
Choosing the right book for your project
The book you choose affects how well the finished shape holds up. A suitable hardcover gives you upright letters; the wrong paper or binding can leave them floppy or distorted. Look for discarded hardcovers at thrift stores, library book sales and second-hand shops.
Hardcover versus paperback
Choose a hardcover for a finished display piece. Its rigid boards hold the folded pages under compression. As you fold hundreds of pages, the extra layers make the fore edge swell while the spine stays the same size. The boards support this wedge shape so the book can stand on a desk or mantelpiece without tipping over.
You can practice on a paperback, but its covers aren't stiff enough for a durable display piece. The flexible spine twists under the uneven tension of the folds, and the covers curl outward. The book can sag or collapse under its own weight.
Page count and the leaf rule
Before counting folds, check that you understand what the pattern means by a page and a leaf:
- A page refers to a single numbered side of a sheet of paper.
- A leaf is the physical sheet of paper itself, containing two numbered pages (one on the front, one on the back).
Book folding patterns count folds by leaves, not pages. If a pattern states that it requires 180 folds, it needs 180 physical sheets of paper, which equals 360 numbered pages.
Choose a book with at least 40 to 80 more numbered pages than the pattern needs. Leave these extra pages unfolded at the front and back to frame the design inside the covers.
Paper weight and paper condition
Standard trade hardcovers typically use uncoated paper between 60 and 90 grams per square meter (gsm). This weight holds a sharp crease without tearing and stays thin enough that several hundred folds do not force the spine to split open.
Avoid the following types of books:
- Glossy or coated art books: The clay coating on glossy paper cracks along fold lines, creating powdery white dust. Glossy sheets are also slick and resist staying creased.
- Mass-market pulp paperbacks: Cheap pulp paper yellows quickly and becomes brittle. Folding along dry, brittle fibers causes the page edges to snap or fray.
- Heavily illustrated children's books: Irregular paper thicknesses and stitched pop-up elements distort measurement coordinates.
- Books with deckled or untrimmed edges: MMF patterns rely on a perfectly straight factory-trimmed fore edge to measure and align folds. Deckled edges produce uneven, jagged contours.
Check the binding before you buy. Open the book flat on a table and look for loose signatures or places where the text block has pulled away from the backing fabric at the spine.
Calculating the start page
Calculate the starting page before you mark anything. This leaves an equal number of unfolded pages at the front and back of the design.
Use this centering formula:
- Look at the last numbered page in your book. Let this number be your Total Book Pages.
- Multiply the total number of folds required by your pattern by two to find your Pattern Pages.
- Subtract Pattern Pages from Total Book Pages to find your Spare Pages.
- Divide Spare Pages by two, rounding down, to find your Start Page Offset.
- If the result is an even number, add one so that you always begin on an odd-numbered page.
In standard English bookbinding, odd-numbered pages sit on the right of an open spread (the recto leaf). Start on that right-hand leaf and work from front to back.
Worked example: centering a heart pattern
Suppose your hardcover novel ends on numbered page 460 and your heart pattern needs 170 folds.
The calculation looks like this:
- Total Book Pages: 460
- Pattern Pages required: 170 folds multiplied by 2 = 340 pages
- Spare Pages: 460 minus 340 = 120 spare pages
- Spare Pages divided by 2: 120 divided by 2 = 60 pages
- Starting Page adjustment: 60 is an even number, so add 1 to get page 61.
Leave pages 1 through 60 untouched and make the first pattern mark on page 61. Your 170 folds run from page 61 through page 400 (340 pages total). Pages 401 through 460 stay unfolded, leaving a border of 60 blank pages on each side of the heart.
If the book has an unnumbered preface or author note, count those leaves as extra front padding. You can also base the calculation strictly on the main Arabic numbering sequence.
Essential tools and materials
A few supplies are enough. A ruler you can read easily and a pencil that makes a fine mark will help you measure accurately without damaging the paper.
Metric ruler
Use a rigid 30-centimeter plastic ruler or stainless steel drafting ruler with centimeter and millimeter markings. Clear acrylic lets you see the page text underneath, which helps you check that the ruler is parallel to the page edge.
Look closely at the zero mark. On some rulers it sits several millimeters in from the end; on others it is flush with the edge. Either works. Each time you measure, line up the zero mark with the top of the page.
Mechanical pencil
A 0.5 mm or 0.7 mm mechanical pencil with HB or 2B lead makes thin, dark dots without constant sharpening. Wooden pencils dull after dozens of pages, leaving thicker, smudged marks that are harder to measure from. A fine 0.5 mm lead in HB or 2B needs little pressure to leave a dark mark, which helps prevent permanent dents in delicate paper.
Support the page on a firm, flat surface while you mark it. The Library of Congress guidelines on the care of works on paper recommend light pencil rather than ink and a hard surface underneath. This helps prevent embossed lines that show through on the reverse.
Bone folder
A bone folder is a smooth handheld tool with a rounded point and beveled edges for scoring and creasing paper. Bovine bone and synthetic Teflon folders glide across the page without shiny burnish marks or snags in older paper fibers.
Keep metal spoons, butter knives and plastic rulers away from the creases. Hard metal edges can stretch the paper grain, cut the crease or leave dark grey scuffs across the text.
Eraser and page fasteners
Keep a soft white vinyl eraser or kneaded rubber eraser nearby. The Northeast Document Conservation Center surface cleaning leaflet notes that abrasive block erasers can scuff delicate paper fibers. Use a soft vinyl eraser shaped to a small point for pencil corrections, and clear away the crumbs before they collect in the gutter.
Hold finished pages out of the way with a wide elastic sewing band, a fabric hair scrunchie or a weighted leather beanbag. Tight metal bulldog clips can pinch and dent the margins. Work with clean, dry, bare hands, as the Library of Congress book preservation guidelines advise. Bare fingertips let you feel the thin leaves more easily, reducing accidental creases and tears.
How to read a book folding pattern
A book folding pattern gives you two or more measurements for each leaf, in the order you will fold them.
Understanding the coordinate table
A standard MMF table has four main columns:
- Leaf Number: The sequential count of folds in the pattern (from 1 up to the total fold count).
- Book Page Number: The actual printed page number in your specific volume where that leaf begins.
- Mark 1 (Top Measurement): The distance in centimeters and millimeters measured from the top page edge to the upper boundary of the silhouette.
- Mark 2 (Bottom Measurement): The distance measured from the top page edge to the lower boundary of the silhouette.
A heart pattern might begin like this:
- Leaf 1 (Page 61): Mark 1 at 9.4 cm, Mark 2 at 12.6 cm
- Leaf 2 (Page 63): Mark 1 at 8.8 cm, Mark 2 at 13.2 cm
- Leaf 3 (Page 65): Mark 1 at 8.2 cm, Mark 2 at 13.8 cm
- Leaf 4 (Page 67): Mark 1 at 7.7 cm, Mark 2 at 14.3 cm
- Leaf 5 (Page 69): Mark 1 at 7.3 cm, Mark 2 at 14.7 cm
Measure both Mark 1 and Mark 2 down from the top edge. It is easy to assume the bottom mark should be measured from the bottom of the page, but that will put it in the wrong place. Using the same reference edge for every mark prevents alignment errors from building up.
At the widest part of the heart, Mark 1 moves nearer the top of the page, so its measurement gets smaller, such as 5.2 cm. Mark 2 moves lower and its measurement gets larger, such as 16.8 cm. At the central cleft, Mark 1 dips lower before rising again for the second lobe.
Multi-mark rows
Some shapes have holes or separate horizontal bars: the letter B, the letter O, or a word with one letter above another.
A row that crosses an opening in the shape will have four or more marks:
- Mark 1: Upper outer edge
- Mark 2: Top edge of the interior cutout
- Mark 3: Bottom edge of the interior cutout
- Mark 4: Lower outer edge
For a four-mark page, fold the top corner down to Mark 1 and the bottom corner up to Mark 4. Two corner folds alone cannot leave an open gap between Mark 2 and Mark 3; patterns with internal openings use cut-and-fold tabs or alternate leaves, so follow their instructions for those pages. A solid shape with exactly two marks per page is easier for a first project.
Step-by-step folding tutorial
Have your starting page calculated and your pattern beside you before you begin. Clear enough space to lay the book flat and move the ruler comfortably.
Step 1: Position the book and ruler
Open the book flat on a clean sheet of paper or newsprint on your worktable. Turn to the start page you calculated, an odd-numbered page on the right.
Lay the ruler along the outer margin of the right-hand page. Set its zero line against the top edge of the leaf and check that it runs parallel to the vertical page edge.
Step 2: Make your pencil marks
Find the two measurements in row 1 of your pattern.
Hold the pencil almost perpendicular to the paper. Make a light dot on the outer margin beside the first measurement, then another beside the second.
Keep each mark to a tiny dot against the ruler gradation. Heavy lines and crosses make it harder to see exactly where the fold belongs.
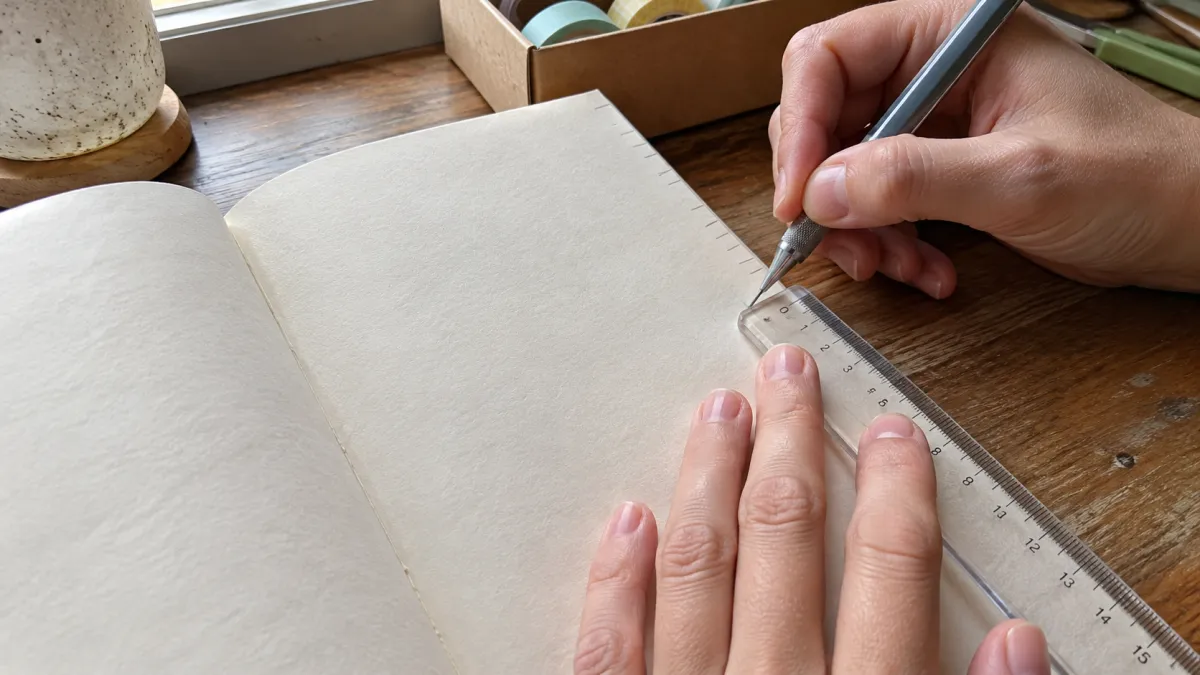
Step 3: Fold the top corner
Move the ruler aside and take the top outer corner between your thumb and index finger.
Fold that corner down and inward toward the spine. Adjust it so the crease starts at the top edge and the folded edge lines up with the top pencil dot.
Set the fold with your finger, then run the bone folder firmly along the crease to flatten it. The crease should run at approximately a 45-degree angle from the top margin to the outer edge.
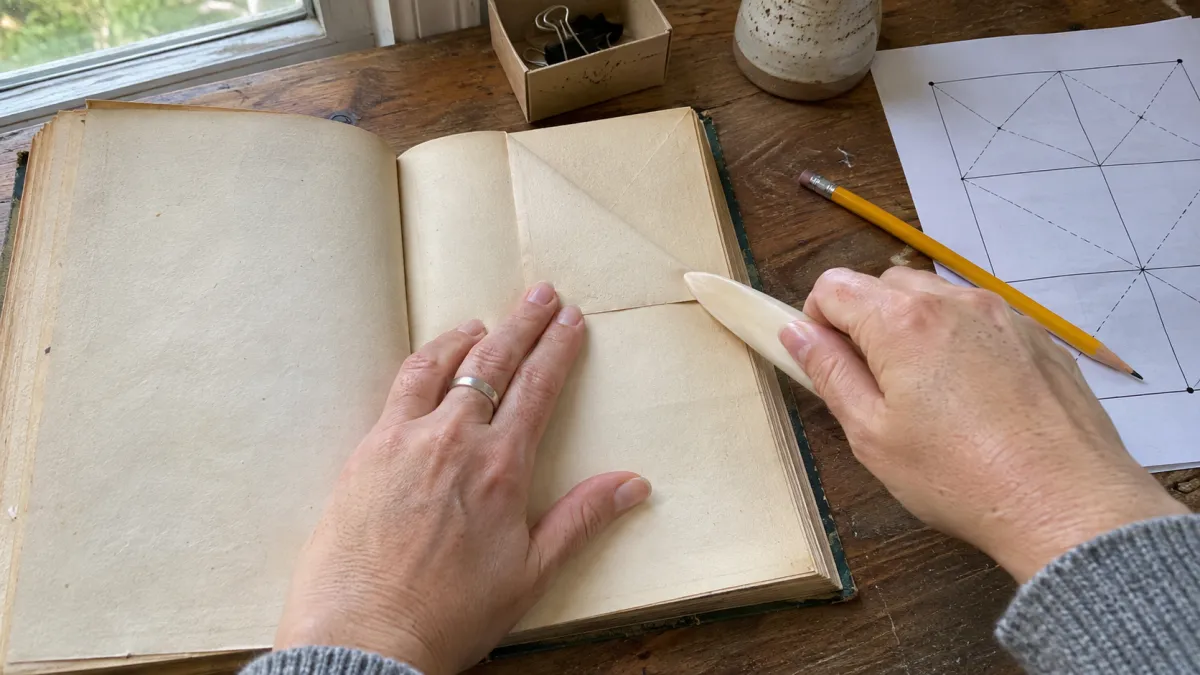
Step 4: Fold the bottom corner
Take the bottom outer corner of the same leaf and fold it up and inward toward the spine.
Adjust it so the crease starts on the bottom edge and the folded edge meets your second pencil dot. Press it flat with a fingertip, then crease it with the bone folder.
That completes Leaf 1. The edge between the dots stays straight and unfolded; the corners tuck inward.
Step 5: Advance and repeat
Turn the leaf to the left, smooth it down and tuck it under your elastic band or page weight.
The new right-hand page is odd-numbered and corresponds to Leaf 2 in the pattern.
Line up the ruler with the top edge again and check row 2. Mark the two points, fold both corners and crease them with the bone folder. Then turn the page.
Work through each row in order. Cross it off on the printed pattern with a pencil or highlighter as soon as you finish that leaf. This makes it easier to keep your place.
Step-by-step worked project: folding a simple heart
This 40-leaf heart project uses the same measuring and folding steps. It gives you a complete pattern to work through in a small book.
Project specifications
- Design: Classic solid heart silhouette
- Total Pattern Folds: 40 leaves (80 numbered pages)
- Target Book: A standard hardcover novel with 200 numbered pages, measuring 21 cm in page height
- Centering calculation: 200 total pages minus 80 pattern pages leaves 120 spare pages. Dividing 120 by two gives 60. Add one to start on an odd page: Page 61.
- Folding range: Page 61 through Page 140.
Complete 40-leaf measurement table
The measurements below are in centimeters from the top page edge. They cover all 40 leaves, so you can use the table as a working template for a small book or practice volume:
- Leaf 1 (Page 61): Mark 1 at 10.2 cm, Mark 2 at 11.0 cm
- Leaf 2 (Page 63): Mark 1 at 9.8 cm, Mark 2 at 11.4 cm
- Leaf 3 (Page 65): Mark 1 at 9.4 cm, Mark 2 at 11.8 cm
- Leaf 4 (Page 67): Mark 1 at 9.0 cm, Mark 2 at 12.2 cm
- Leaf 5 (Page 69): Mark 1 at 8.6 cm, Mark 2 at 12.6 cm
- Leaf 6 (Page 71): Mark 1 at 8.2 cm, Mark 2 at 13.0 cm
- Leaf 7 (Page 73): Mark 1 at 7.8 cm, Mark 2 at 13.4 cm
- Leaf 8 (Page 75): Mark 1 at 7.4 cm, Mark 2 at 13.8 cm
- Leaf 9 (Page 77): Mark 1 at 7.0 cm, Mark 2 at 14.2 cm
- Leaf 10 (Page 79): Mark 1 at 6.6 cm, Mark 2 at 14.6 cm
- Leaf 11 (Page 81): Mark 1 at 6.3 cm, Mark 2 at 15.0 cm
- Leaf 12 (Page 83): Mark 1 at 6.0 cm, Mark 2 at 15.4 cm
- Leaf 13 (Page 85): Mark 1 at 5.8 cm, Mark 2 at 15.8 cm
- Leaf 14 (Page 87): Mark 1 at 5.6 cm, Mark 2 at 16.2 cm
- Leaf 15 (Page 89): Mark 1 at 5.5 cm, Mark 2 at 16.6 cm
- Leaf 16 (Page 91): Mark 1 at 5.5 cm, Mark 2 at 17.0 cm
- Leaf 17 (Page 93): Mark 1 at 5.6 cm, Mark 2 at 17.2 cm
- Leaf 18 (Page 95): Mark 1 at 5.8 cm, Mark 2 at 17.4 cm
- Leaf 19 (Page 97): Mark 1 at 6.2 cm, Mark 2 at 17.5 cm
- Leaf 20 (Page 99): Mark 1 at 6.8 cm, Mark 2 at 17.6 cm
- Leaf 21 (Page 101): Mark 1 at 6.8 cm, Mark 2 at 17.6 cm
- Leaf 22 (Page 103): Mark 1 at 6.2 cm, Mark 2 at 17.5 cm
- Leaf 23 (Page 105): Mark 1 at 5.8 cm, Mark 2 at 17.4 cm
- Leaf 24 (Page 107): Mark 1 at 5.6 cm, Mark 2 at 17.2 cm
- Leaf 25 (Page 109): Mark 1 at 5.5 cm, Mark 2 at 17.0 cm
- Leaf 26 (Page 111): Mark 1 at 5.5 cm, Mark 2 at 16.6 cm
- Leaf 27 (Page 113): Mark 1 at 5.6 cm, Mark 2 at 16.2 cm
- Leaf 28 (Page 115): Mark 1 at 5.8 cm, Mark 2 at 15.8 cm
- Leaf 29 (Page 117): Mark 1 at 6.0 cm, Mark 2 at 15.4 cm
- Leaf 30 (Page 119): Mark 1 at 6.3 cm, Mark 2 at 15.0 cm
- Leaf 31 (Page 121): Mark 1 at 6.6 cm, Mark 2 at 14.6 cm
- Leaf 32 (Page 123): Mark 1 at 7.0 cm, Mark 2 at 14.2 cm
- Leaf 33 (Page 125): Mark 1 at 7.4 cm, Mark 2 at 13.8 cm
- Leaf 34 (Page 127): Mark 1 at 7.8 cm, Mark 2 at 13.4 cm
- Leaf 35 (Page 129): Mark 1 at 8.2 cm, Mark 2 at 13.0 cm
- Leaf 36 (Page 131): Mark 1 at 8.6 cm, Mark 2 at 12.6 cm
- Leaf 37 (Page 133): Mark 1 at 9.0 cm, Mark 2 at 12.2 cm
- Leaf 38 (Page 135): Mark 1 at 9.4 cm, Mark 2 at 11.8 cm
- Leaf 39 (Page 137): Mark 1 at 9.8 cm, Mark 2 at 11.4 cm
- Leaf 40 (Page 139): Mark 1 at 10.2 cm, Mark 2 at 11.0 cm
Observing the shape emerge
The left rounded lobe develops as you fold Leaves 1 through 15. Across Leaves 19 through 22, Mark 1 dips to 6.8 cm to form the center notch. Leaves 23 through 40 mirror the left lobe on the right and taper to a point at the base.
After the final leaf, remove the elastic band and stand the book upright. Gently fan the folded pages with your fingertips to spread their tension evenly, then open the covers to a 90-degree angle. The edges settle into a three-dimensional heart inside the book. The folded corners interlock slightly, giving it a base that supports it on a level shelf or tabletop.
How to create your own simple patterns
Once you can read a folding table, you can draw patterns for simple shapes, numbers or monograms. You do not need specialized commercial software.
Drafting on millimeter graph paper
To make a custom pattern by hand, use standard millimeter graph paper:
- Measure the height of your chosen book page in millimeters (for example, 210 mm).
- Draw a vertical box on your graph paper that matches the page height in scale (using 1 millimeter on paper for each millimeter of book height).
- Determine how many leaves your book has available for the pattern (for example, 80 leaves).
- Draw 80 vertical grid columns across your box. Each column represents one leaf.
- Sketch your desired silhouette inside the grid box using a pencil. Simple, bold shapes such as a block capital letter or an anchor work best.
- For each vertical column, find where your sketched silhouette begins and ends. Read the millimeter measurement from the top border of the box down to the upper edge of your drawing (Mark 1), and then down to the lower edge of your drawing (Mark 2).
- Record these pairs of measurements in a notebook or spreadsheet.
Digital pattern generators
Free web-based folding tools and craft community spreadsheets can turn a black-and-white silhouette into an MMF table. To get usable measurements:
- Upload high-contrast silhouette images with pure black shapes against pure white backgrounds.
- Avoid blurry photographs, gradients, or thin cursive script, which create confusing scattered coordinates.
- Enter your exact book height and available leaf count into the software settings so the resulting table matches your volume.
Fixing common book folding mistakes
Misreading a ruler or skipping a page happens even with practice. MMF uses no glue or cuts, so you can correct most mistakes.
Correcting a misaligned fold
A crooked page or jagged notch in a letter usually means you misread a measurement or folded to the wrong dot.
To fix the page:
- Open the incorrect fold completely.
- Lay the leaf flat against a firm table.
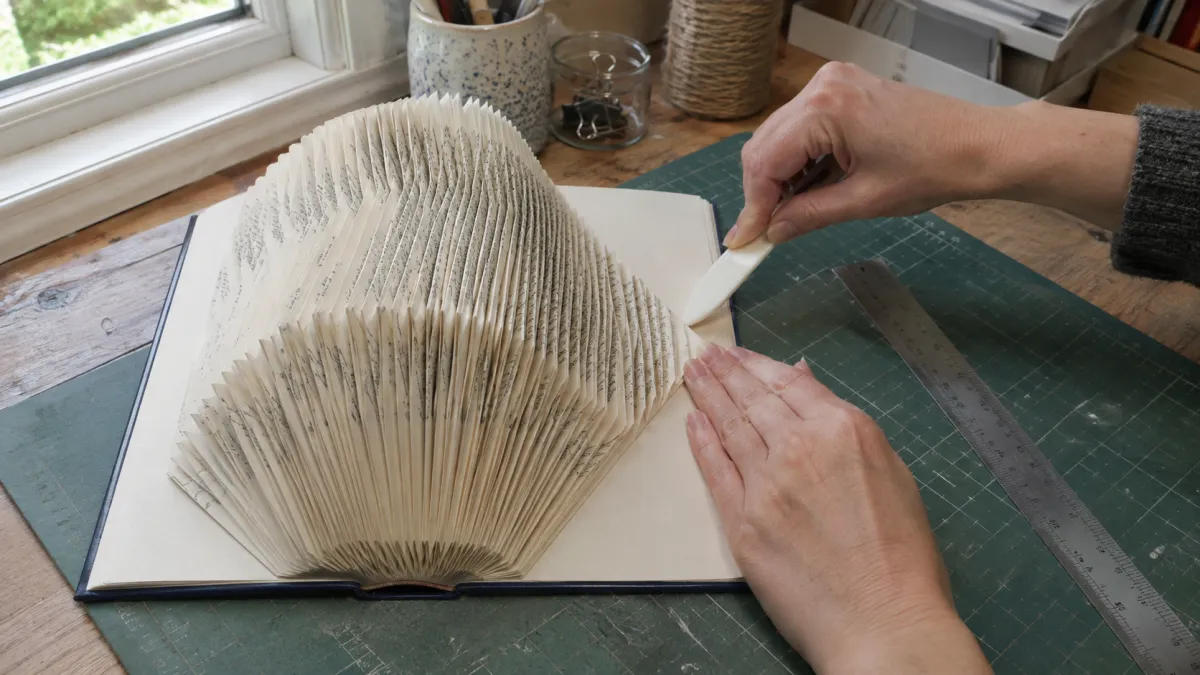
- Use the flat belly of your bone folder to burnish the old crease from both sides, smoothing the paper fibers back into place.
- Re-measure the leaf from the top edge and place a new, distinct pencil mark.
- Refold the corner to the corrected mark and re-crease firmly.
The old crease will still be faintly visible on the page, but it stays hidden inside the finished, fanned-open book.
Handling skipped or doubled pages
If the printed page number no longer matches your pattern sheet, check whether you turned two leaves together or skipped a pattern row.
Work backward through the folded leaves until you find where the numbers stopped matching:
- If you accidentally folded two leaves as one: Open the two leaves, separate them, and fold each leaf individually according to its correct pattern row.
- If you skipped a row in your pattern table: If the mistake happened within the last three or four leaves, unfold back to the error point and redo them. If the skipped row happened fifty pages earlier on a simple shape like a heart, the sculpture will usually absorb the single-leaf shift without noticeable visual distortion.
Dealing with spine distortion and storage
Folding makes the fore edge thicker, but the binding cloth still holds the spine at its original width. The swelling can strain the joints.
Give the folded pages room when you display or store the book:
- Never force a book closed with heavy clamps or tight bands once folding is finished. The fore edge needs room to rest fanned open.
- Store completed volumes in stable home environments. The National Archives preservation standards recommend keeping paper items away from damp basements, hot attics, and direct sunlight to prevent paper fibers from yellowing or becoming brittle.
- When packing or resting a folded book for long periods, follow the Northeast Document Conservation Center storage recommendations, which advise shelving bulky volumes flat; for a folded book, rest it so nothing presses on the folds.
Frequently asked questions
How do I know whether my book has enough pages?
Divide the last numbered page by two to find the total leaf count. You need more leaves than the pattern uses: a 200-fold pattern needs at least 400 numbered pages, plus an extra 40 to 80 pages for the borders.
Why does my folded design look stretched or squished?
The proportions depend on paper thickness relative to page height. Thick, heavy paper adds more depth with each fold and stretches the design horizontally. Thin paper compresses it. Most pattern designers base their proportions on standard 60 to 90 gsm novel paper.